
Blocking iCloud Private Relay will prevent users using Apple devices from evading Pi-Hole’s content filtering ability. Pi-Hole is fantastic open-source software that allows you to block web content.
The main purpose of Pi-Hole is to block web-based advertising, but can also be used to filter other less appropriate content from being accessible on your network.
However it’s very easy to circumvent this blocking technique, especially on Apple devices such as iPhones and iPads and with the release of iOS 15, Apple introduced a feature called iCloud Private Relay.
When iCloud Private Relay has been enabled, your DNS requests are sent through two separate internet relays. This effectively stops your Apple device from using the DNS server it was provided by your router when it was given its IP address, Gateway address, and DNS address via DHCP.
Your DNS records are now encrypted, however, your IP address is still visible to your network provider (ISP) and to the first relay, which is operated by Apple. Your DNS requests are encrypted meaning your ISP nor Apple can see the address of the website you are visiting.
The second relay used by iCloud Private Relay is operated by a third party, they then generate a temporary IP address for you, and then decrypt the DNS request for the site you requested, they then connect you to the website.
iCloud Private Relay will basically get around your content filtering, allowing the user of the device access to content that you have blocked, For example, adult content.
As the device’s DNS requests are now encrypted, you would not see these DNS requests at all when looking through the query logs in Pi-Hole.
However, the process of blocking iCloud Private Relay is quite straightforward in Pi-Hole.
Start to Block iCloud Private Relay.
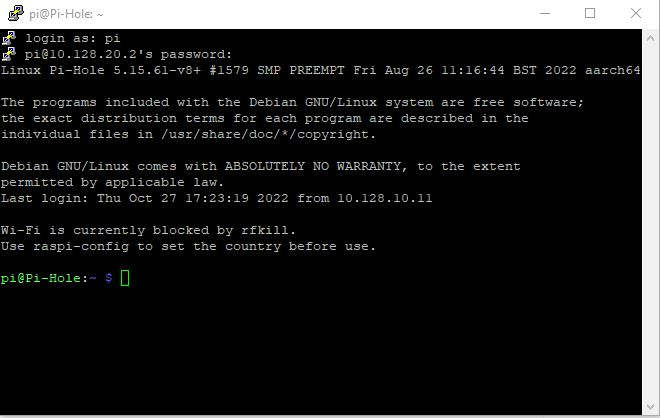
When you have connected to your Raspberry Pi via SSH you will be presented with the login screen. log in with your Rasberry Pi username and password.
Now create a file called pihole-FTL.conf, this file will be ready when your Pi-Hole starts up.
Now type
sudo nano /etc/pihole/pihole-FTL.conf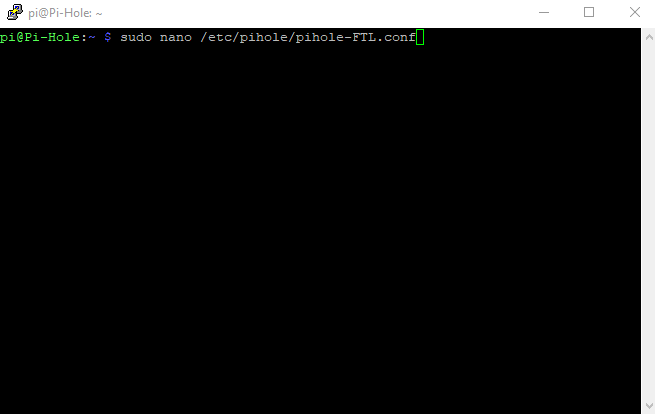
When the editor window opens type this BLOCK_ICLOUD_PR=true
This is a screenshot of my pihole-FLT.conf file.

Now save the file by pressing the control key and X, then press Y and then press the enter key.
BLOCK_ICLOUD_PR=true makes Pi-Hole reply with NXDOMAIN for both mask.icloud.com and mask-h2.icloud.com DNS requests. Effectively creating a block for iCloud Private Relay on the device.
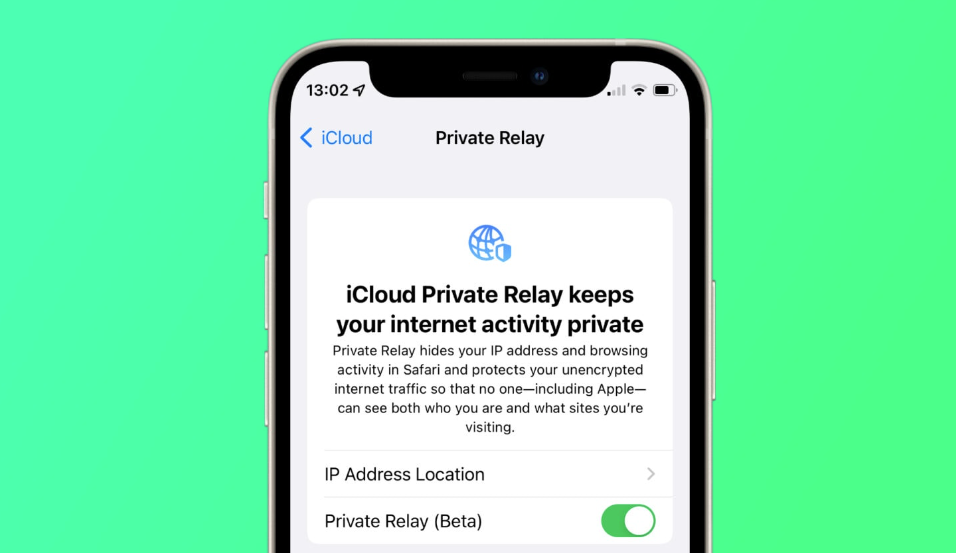
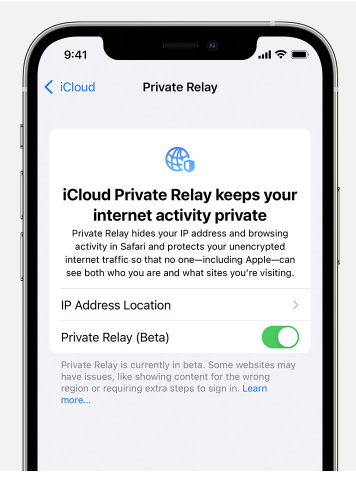
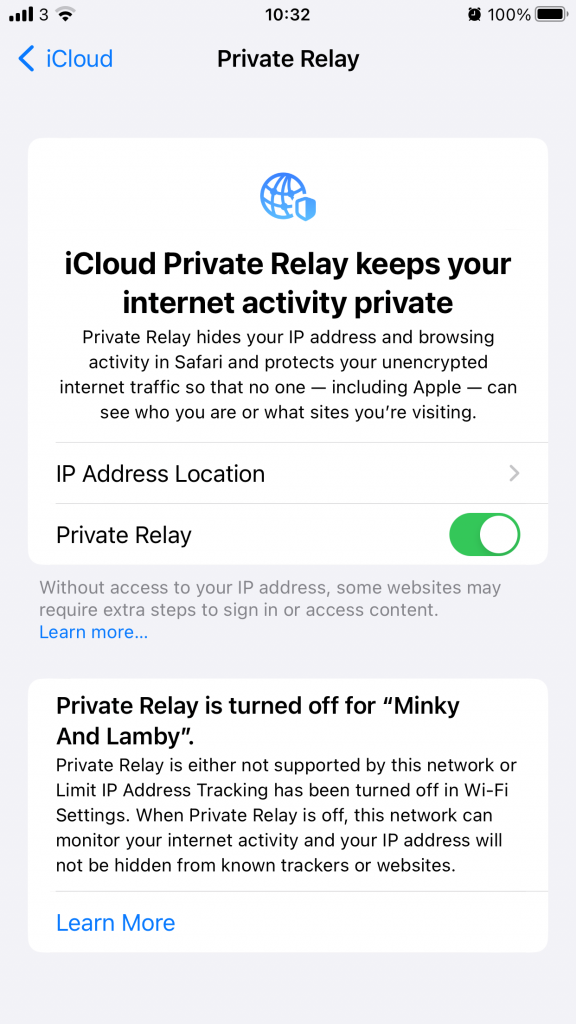
When your device detects that your network has blocked iCloud Private relay, it will show a warning like this on your iPhone or iPad.
Now all of your iOS device’s DNS requests will go through your Pi-Hole, and the content will be blocked as per your block lists, whilst these devices are on your network.
For other options and values that can be entered into this file, take a look at the great documentation on Pi-Hole’s website here.


Heya! I’m at work surfing around your blog on my iphone!
Just wanted to say I love reading through your blog and look forward to all your posts!
Keep up the excellent work!
Thomas